Efficiently manage user access in Epicor ECM (DocStar) by assigning individual user accounts. This empowers system administrators to precisely allocate permissions within the system. Follow the steps below for effective user management.
Creating Users
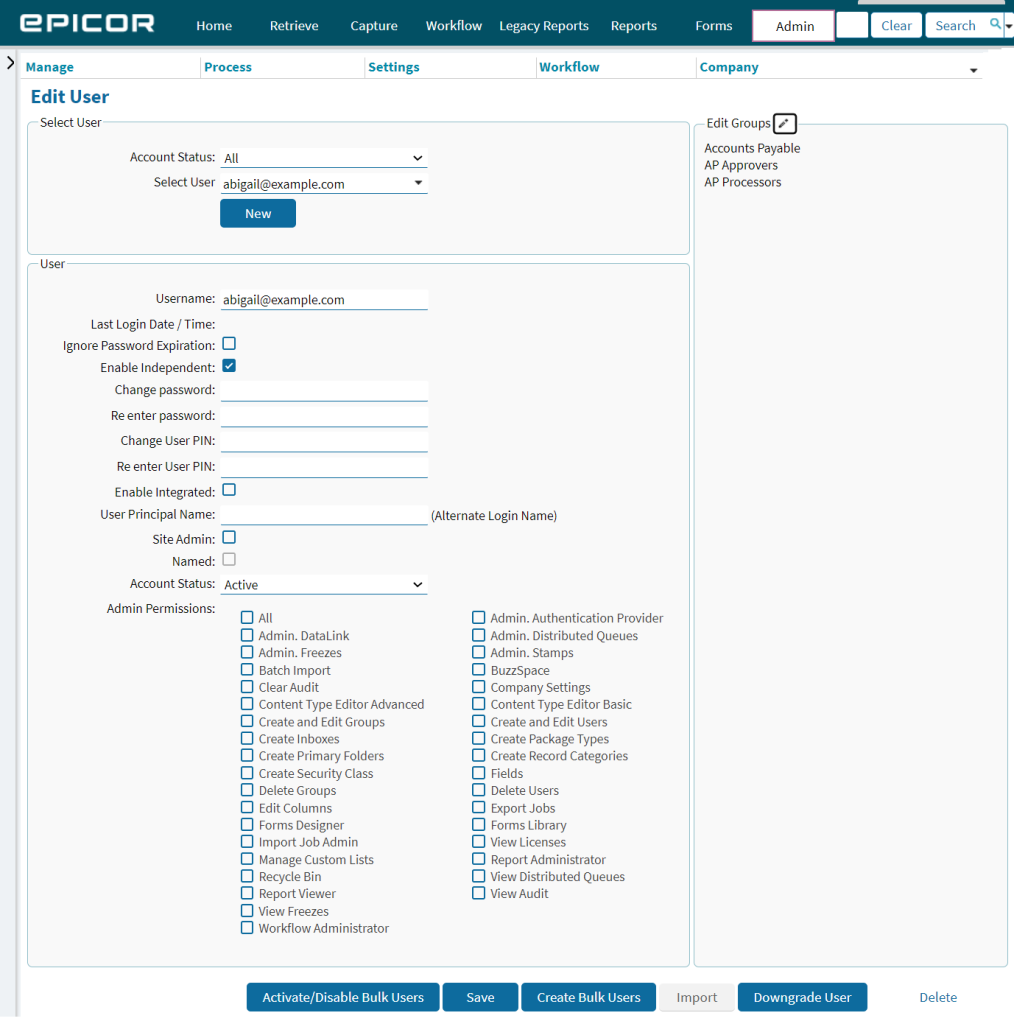
Navigate to the Edit User page: Admin > Manage > Users.
To create a new user:
From the Select User drop-down, choose –New –.
Input a valid email address in the Username field.
Complete the remaining user setup fields and assign a group.
Select Save.
Group Membership
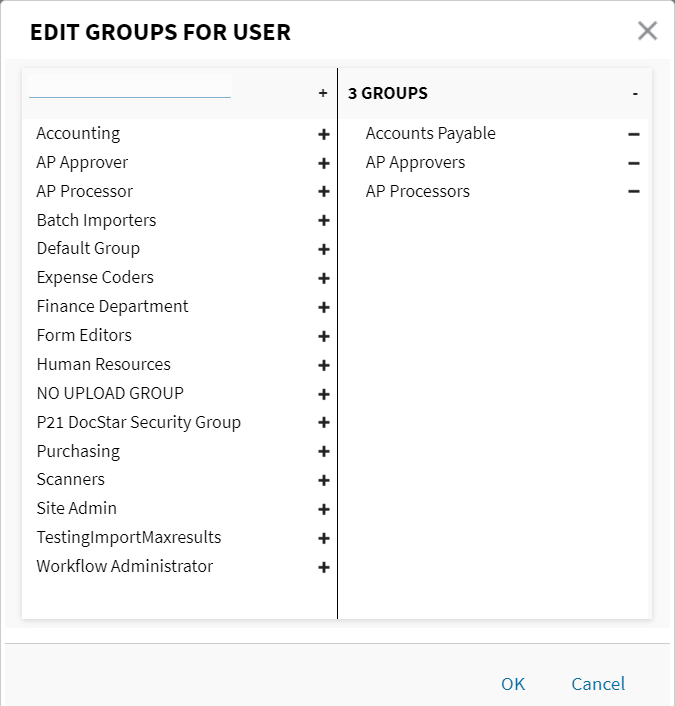
Organize user permissions by associating users with specific groups.
Select the Edit Groups (pencil) icon.
The Edit Groups for User window displays.
To add or remove the user from groups:
Use the + icon (plus) to add groups or the – icon (minus) to remove groups.
Utilize the search box and + icon to add all displayed groups.
Select the – icon at the top to remove all groups for the user.
Select OK.
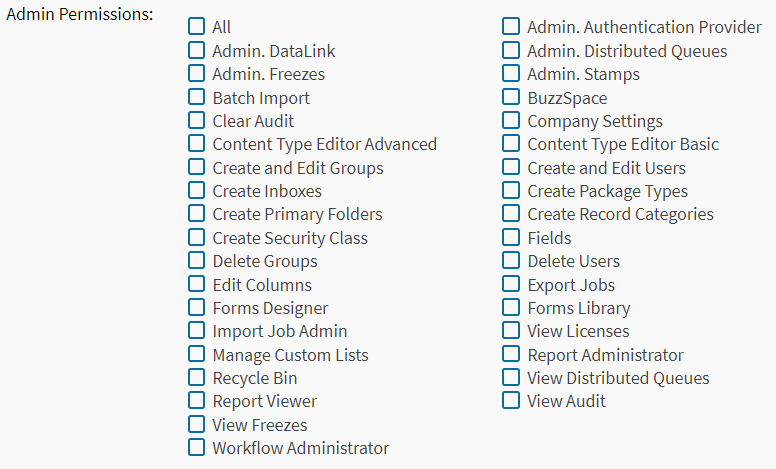
Admin Permissions for User Accounts
Define user capabilities within Epicor ECM (DocStar) by selecting Admin Permissions for the user
Admin Permission Options:
All: Grants all current and future permissions.
Admin. Authentication Provider: Enables access to authentication provider (LDAP, SAML) importing and modification.
Admin. Datalink: Provides access to DataLink importing and modification.
Admin. Distributed Queues: Allows deletion of Distributed Queues and disabling Queue Processors.
Admin. Freezes: Facilitates creation, modification, and release of Freezes.
Admin. Stamps: Permits maintenance of all image and text stamps.
Batch Import: Grants access to the Batch Import page.
BuzzSpace: Enables access to create, modify, and delete Buzzspaces.
Clear Audit: Allows access to clear the audit table.
Company Settings: Grants access to the Company Settings.
Content Type Editor Advanced: Provides access to the Content Type Editor: Advanced tab, allowing the creation, editing, and deletion of Content Types.
Note: This permission includes access to the basic editor, regardless of the Content Type Editor Basic permission.
Content Type Editor Basic: Allows access to the basic Content Type Editor, facilitating the creation, editing, and deletion of Content Types based on permissions.
Create and Edit Groups: Provides access to create and edit (excluding deletion) groups.
Create and Edit Users: Facilitates access to create and edit (excluding deletion) user accounts.
Create Inboxes: Enables access to create Inboxes.
Create Package Types (*): Allows the creation of Package Types and Submission Types.
Create Primary Folders: Grants access to create primary folders.
Create Record Categories: Allows the creation of Record Categories.
Create Security Class: Provides access to create Security Classes.
Fields: Facilitates access to creating, modifying, and deleting fields and field groups.
Delete Groups: Allows access to delete groups (excluding users).
Delete Users: Grants access to delete user accounts.
Edit Columns: Enables access to edit a Grid’s selected Row’s Column values.
Forms Designer (^): Allows editing of forms on the Forms tab.
Note: Requires the Forms module.
Forms Library (^): Enables access to the Forms tab, granting the ability to create documents based on a form.
Note: Requires the Forms module.
Import Job Admin: Provides full access to import jobs other than one’s own.
View Licenses: Allows access to the License Statistics page.
Manage Custom Lists: Facilitates modification of custom lists.
Report Administrator ($): Grants the ability to create and edit existing reports.
Note: Requires the ReportWorks module.
Recycle Bin: Allows access to the recycle bin.
View Distributed Queues: Permits view-only access to Distributed Queues.
Report Viewer ($): Enables access to view existing reports.
Note: Requires the ReportWorks module.
View Audit: Allows searching of the audit table.
View Freezes: Grants view-only access to Records Management Freezes.
Workflow Administrator: Allows the creation of work processes in the Workflow Designer tool, access to all queues, processing of any item, and view access to the Workflow Dashboard.
Note: Requires the Workflow module.
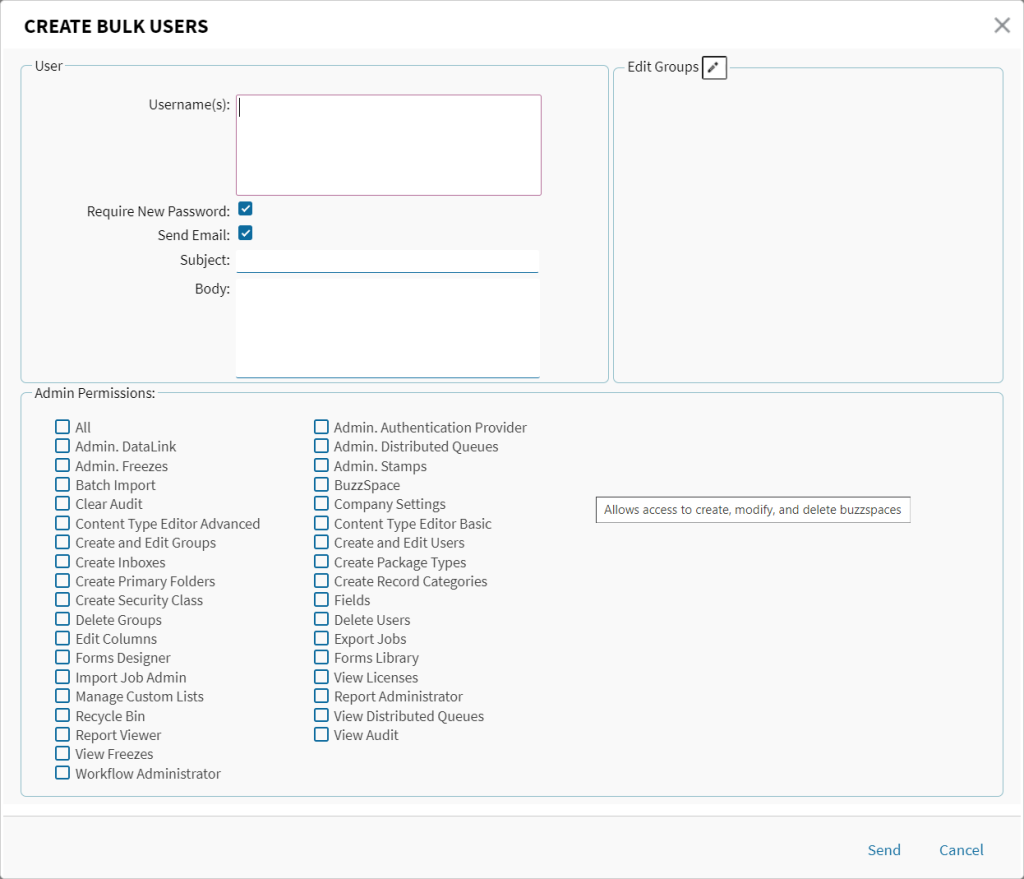
Create and Edit Users in Bulk
Utilize the Create Bulk Users button to efficiently create multiple user accounts.
Select the Create Bulk Users button.
Enter a comma-separated list of Usernames, write an email message, select Group(s), and set Admin Permissions.Upon selecting Send, all users receive an email with login instructions.
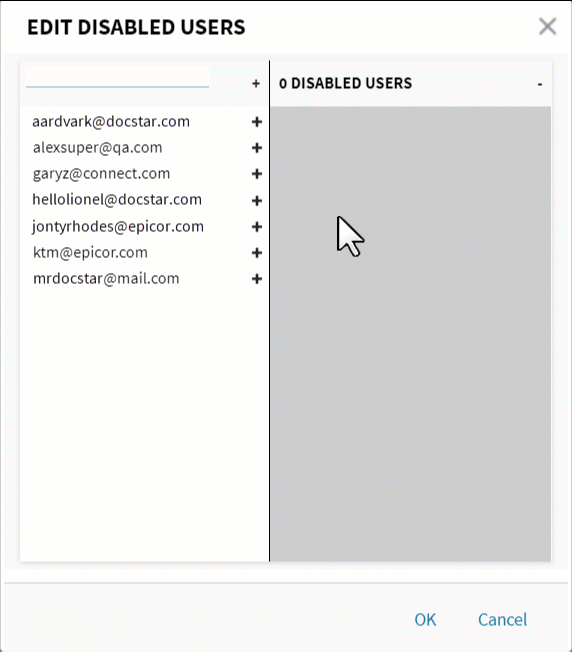
Edit Bulk Users
In the Edit Bulk Users window, disable or reactivate multiple users at once.
Select Activate/Disable Bulk Users.
The Edit Bulk Users window opens.
Use the + icon (plus) to disable users or the – icon (minus) to reactivate users.
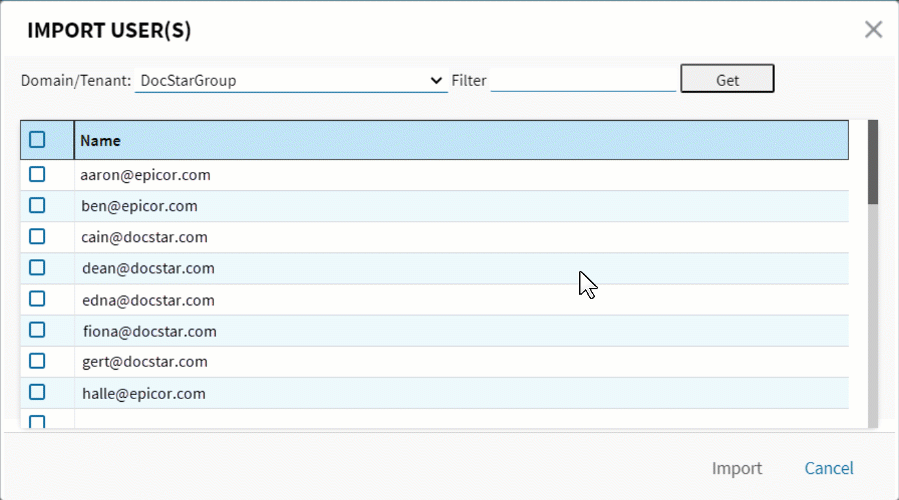
Import LDAP Users
Import LDAP users with ease using the Import option.
On the Edit User screen, select the Import button.
The Import User(s) window displays.
Select the Domain/Tenant, enter a filter, and choose Get.
The results display in the grid.
Select users and choose Import.
Delete or Downgrade Users
Delete: Remove the selected user, prompting selection of a new assignee for workflow items.
Downgrade User: Shift the user to view-only status, manageable in the View Only Users admin page.